+7 963 858 05 08
To do it we need :
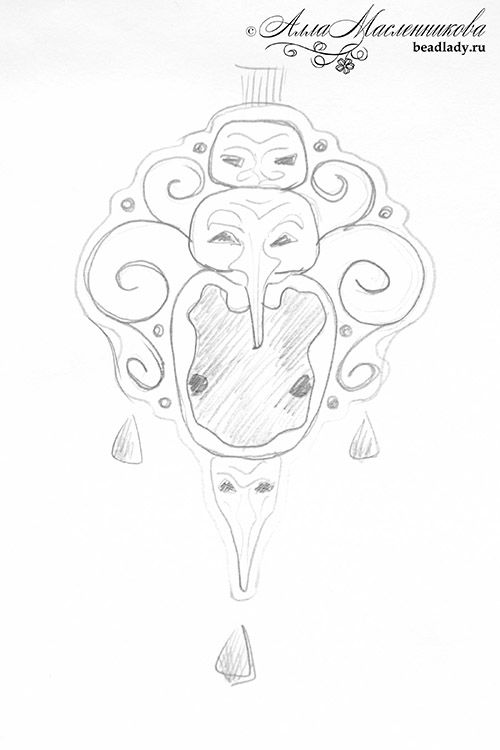
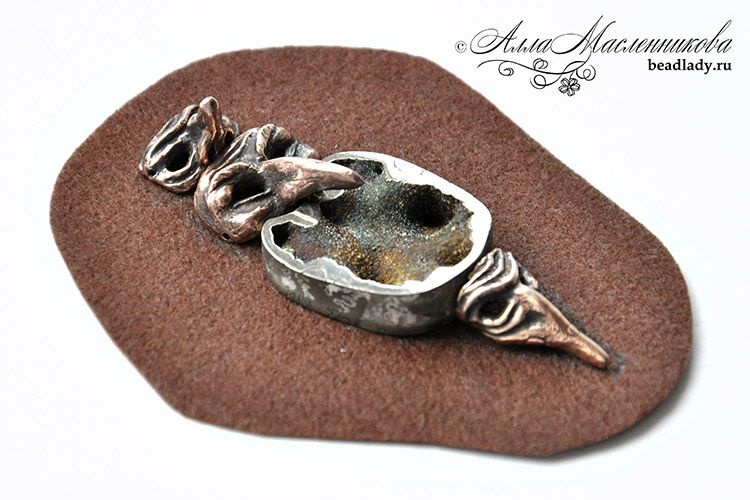
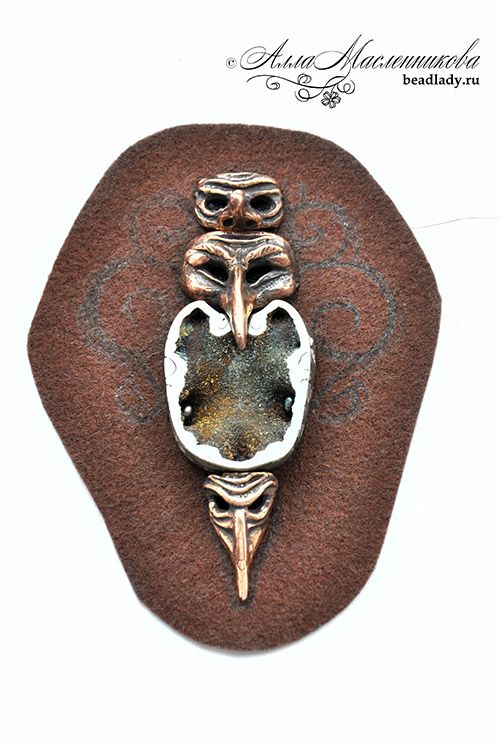
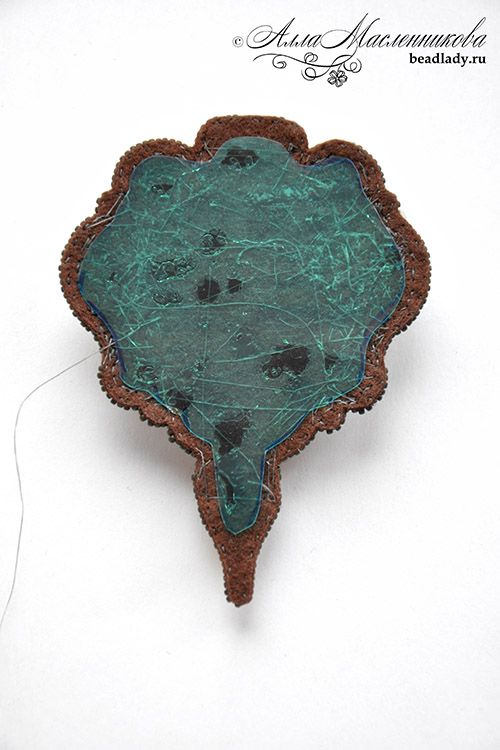
2. Copy the painting on a basis for an embroidery . It can be rigid or soft felt UltraSeude, leather or something else. I have chosen a rigid felt. There are many ways of copying paintings to basis. As for me I made it simply- I cut a piece of basis for embroidery of needed sizes, lead it round and sew ammonite and masks, and then draw the rest of details. It is important to cut the basis not on contour of accessory, but with allowance (I have 1-1,5 sm).
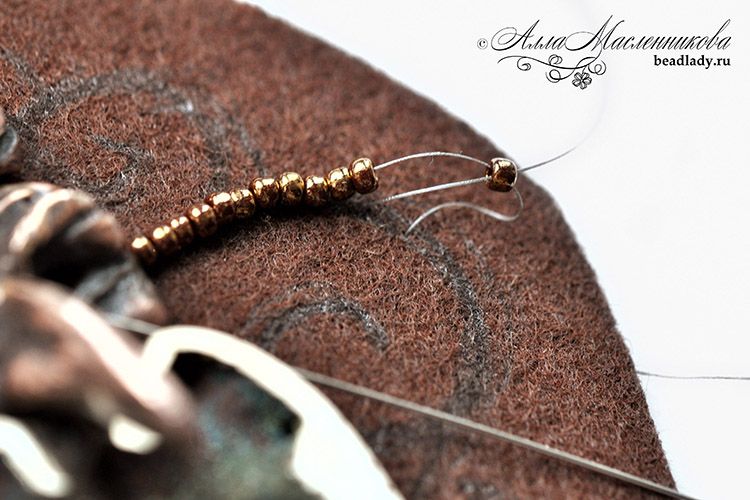
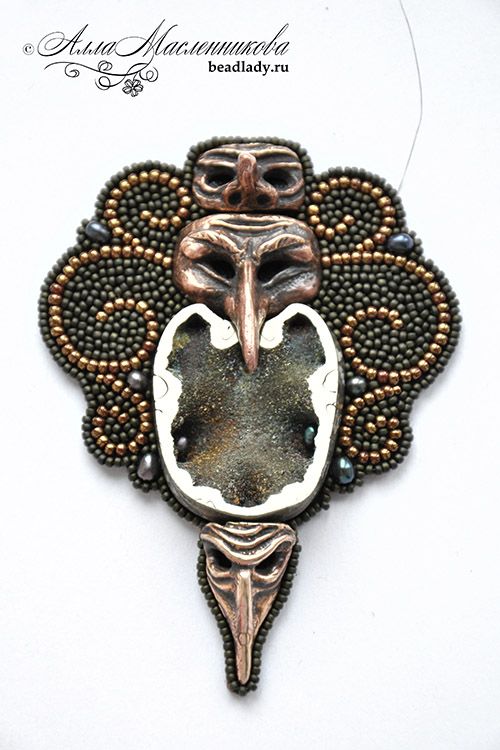
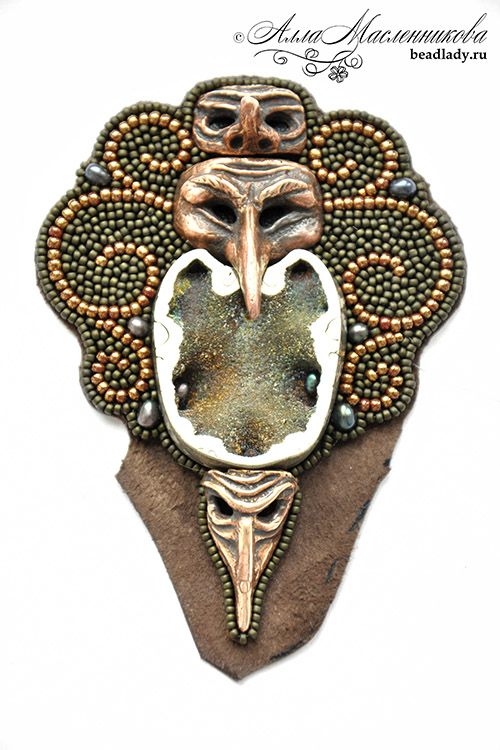
3. Our pendant has a symmetric and quite thin ornament, so you should begin embroidery with it. It is made by beads 11/0 and seed-pearls. At first I sew beads -three pieces at once. You can see that at 3b photo the result is not very accurate , it is better at photo 3c because I straighten it by hands.
4. Now fix the unfixed beads with separate stitches to make an ornament more accurate. Why not at once? It depends on your personal preferences and features of the basis for embroidery. On the one hand, it's more convenient for me to plan my drawing at first and then fix it carefully. From the other hand, the felt both rigid and soft has a special feature :if stitches are too short the thread draws and tears the basis. To avoid it we should sew some beads and then fix them up in proper places. As the result we have an accurate work.
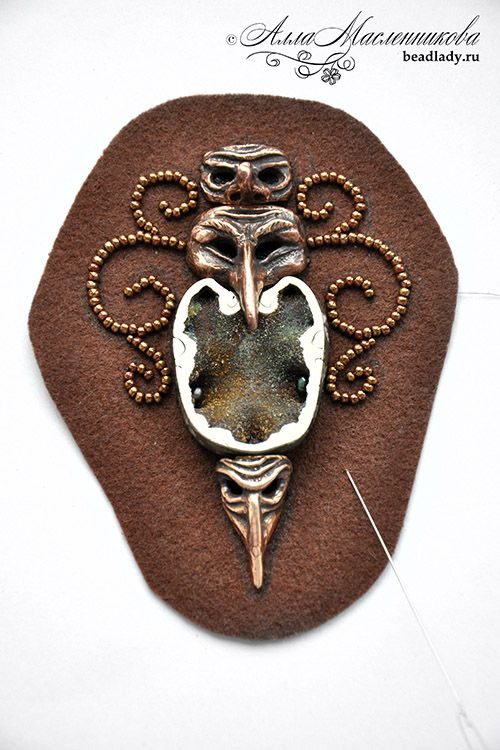
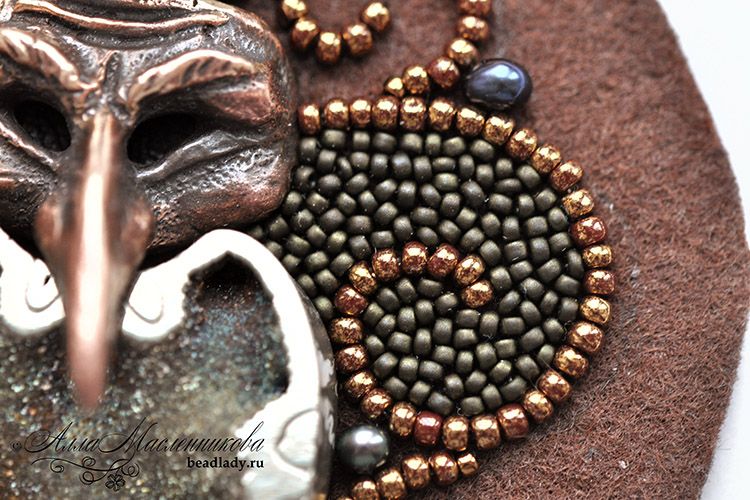
5. Now fill in the background inside the ornament with tiny mate beads. I made it in chaotic order, but densely.
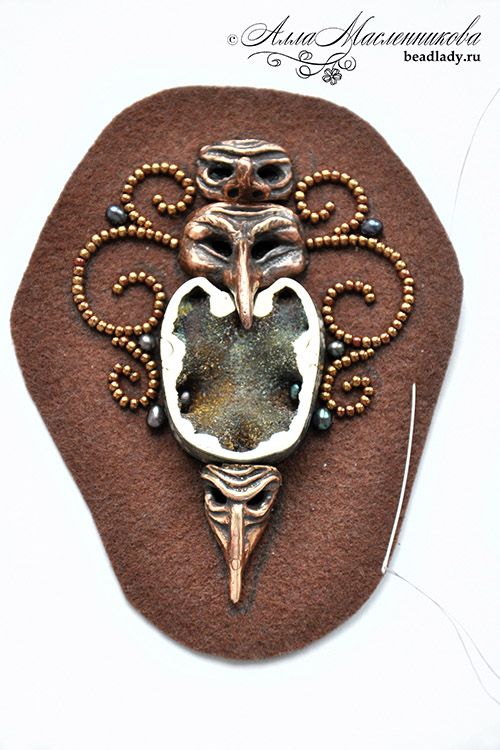
6. Then made a contour at the edge of ornament. There you can and should sew tiny beads (3 pieces at once ). We don't need any additional fastening, because the form will be kept by a good tension of thread and the previous embroidery of contour. And later the form of contour will be fixed better while binding the edge of the pendant .
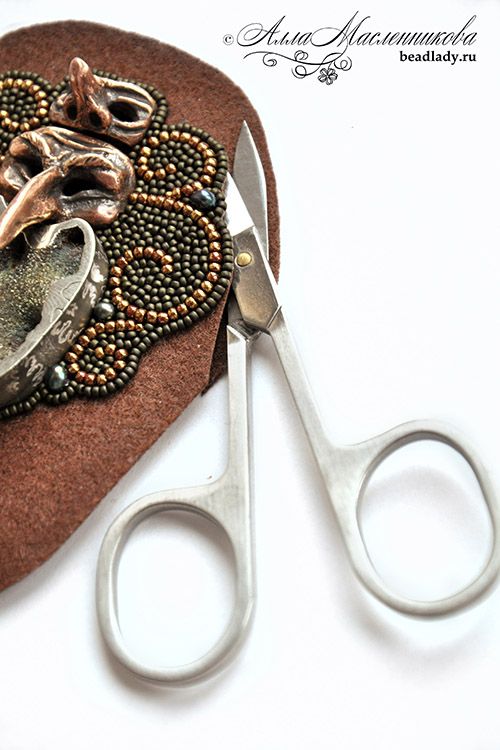
7. When the embroidery is finished, it is the most important moment:we should cut the allowance of basis accurately on a contour of embroidery. I am doing it with clippers , you shouldn't hurry not to cut the threads of the embroidery . It is better to cut it far away from beads and then finish looking inside.
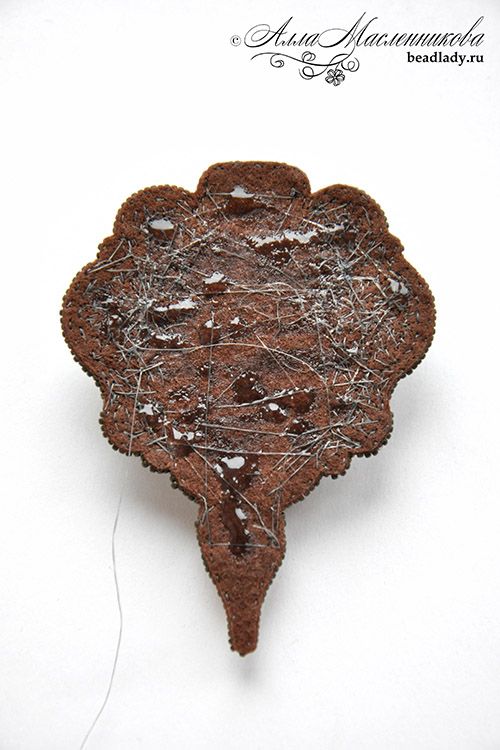
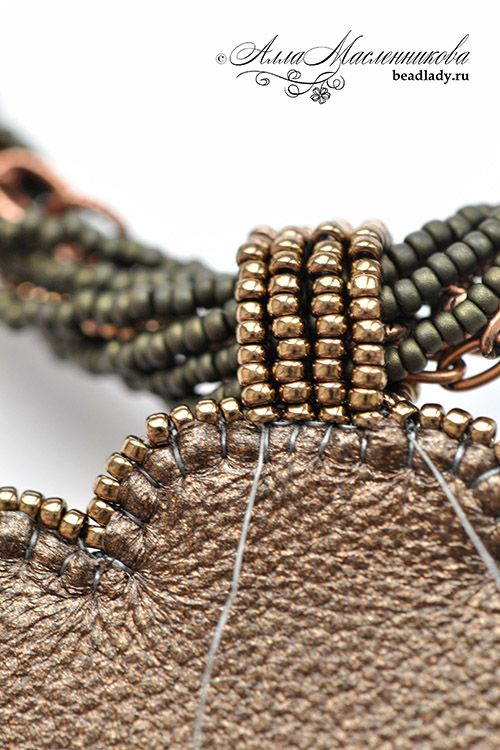
8. Now make a" sandwich" from an embroidery, a rigid laying and a reverse. I choose a leather for the reverse of an accessory. A rigid laying maybe different, for example dublerin, whatman paper or a piece of plastic folder. The most professional and ecological variant is dublerin, but it increases the thickness of the lower layer, so it doesn't suit sometimes. The leather I used for the reverse of my pendent was rather thick ,so I use also a piece of plastic folder for rigidity. It is cut on the form of embroidery, but it is 2-3 mm less , and then it is pasted to the embroidery from reverse with glue like "Moment Crystal ". Leather is cut with allowance and pasted with the same glue.
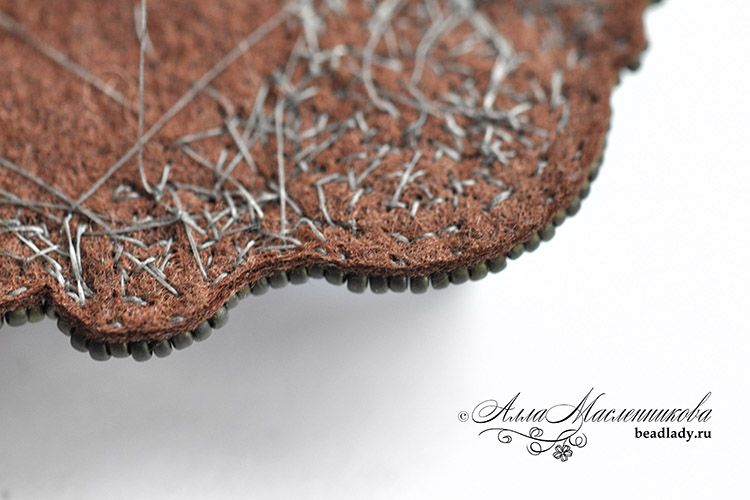
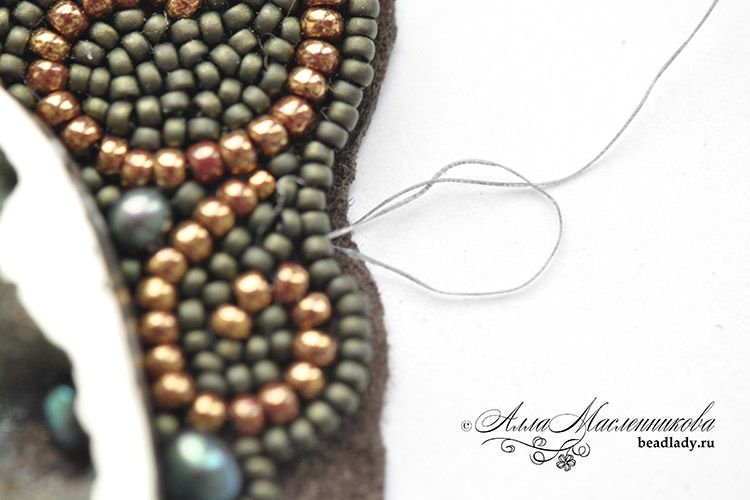
9. Now we cut leather accurately on the contour of the pendent , having a small allowance, about 1,5 mm for (for small beads). The places where the form is difficult to cut, it's better not to cut the allowance, because you can do it when you reach the right place while binding the edge.
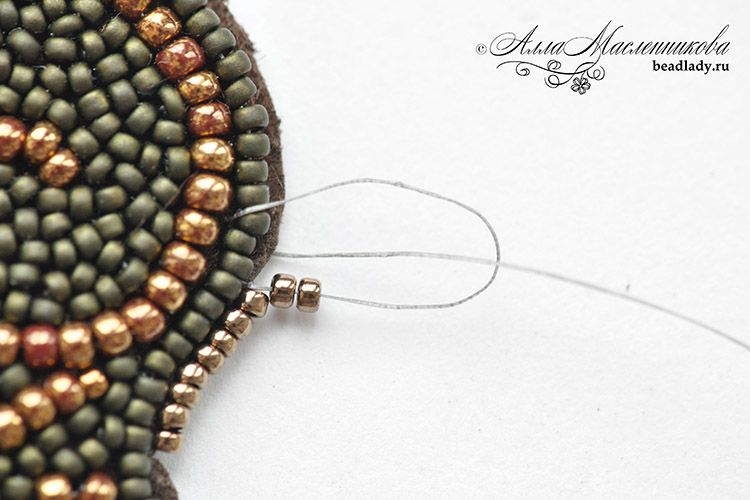
10. Now you can bind the edge. Start with more or less glace part of the contour, where there are no angles. At first we fix all the layers with buttonhole stitches, then bind the edge by buttonhole seam, stringing 2 beads on the thread at every stitch. Continue to bind the edge while we have 1 cm to the angle.
11. The angels of our pendant are concave. Then we should cut our small allowance to make the reverse laying better at these angles. The cut piece of leather will look as a tick. It seems the small piece of allowance is left at the drawing, but the reason is a perspective, but you should pay attention to difference of allowance width.
12. Finish to bind the edge. When we have the places where the allowance is not cut,we stop and cut it. Why? Because leather is rather elastic material and it can deform a bit while sewing. So as if we cut out an ideal contour completely at the beginning of work, then the edge of leather will be displaced a bit and stretch while binding the edge. As the result we can damage all the work. You shouldn't hurry and it will be accurate. Pearl drops should be sewn while binding the edge. Pay attention that some beads on the edge at the top of the pendent are sewn vertically, it isn't necessary, but convenient when you suspend a pendent. Then we fix the thread and hide it inside the pendant.
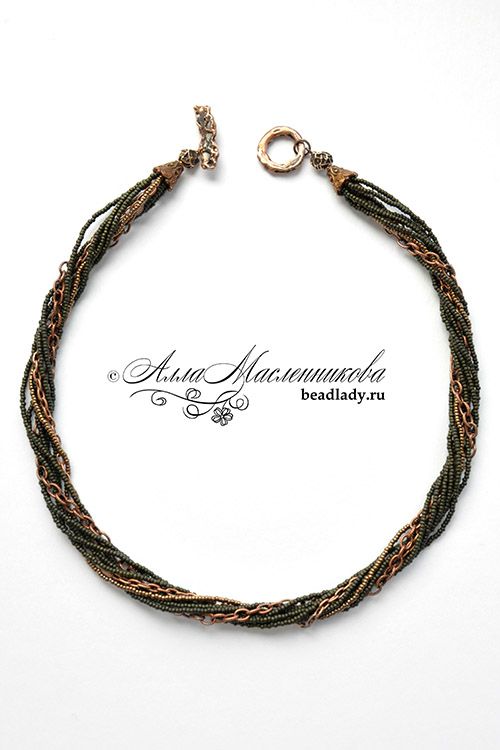
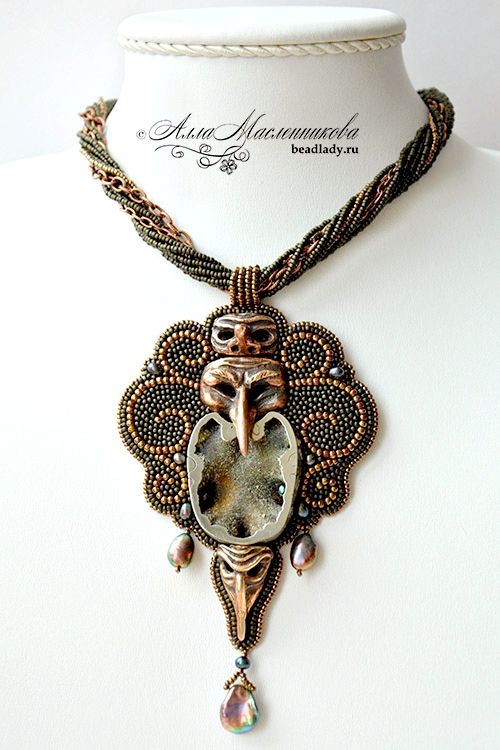
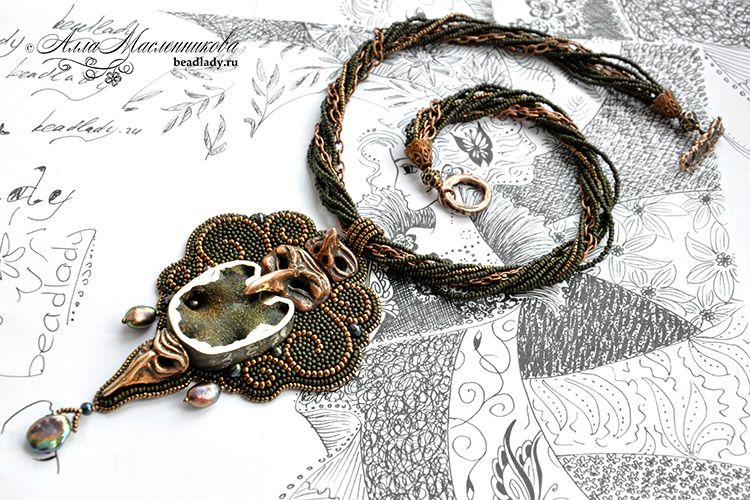
13. Now it's time to make a basis for the drop. The pendant will hang out rather freely, so eyelets of pins are connected by threads with small beads 38-40 cm in length. 9-10 threads are enough. Then we attach chains. The eyelets of pins are hidden under the caps, the beads will help to fix them and be an intermediate link in case you have a lock-toglo. Close the endings of pins with eyelets and attach to the lock with junction rings.
14. Now we are ready to hang the pendent. Fix thread near the last bead,sewn vertically. Pass thread into a bead to outside and make a loop round the basis.pass back to the last bead and continue to make loops through all the vertically sewn beads. It is useful to tighten them strictly. After finishing we should fix the thread. If necessary we can pass again through the eyelets.
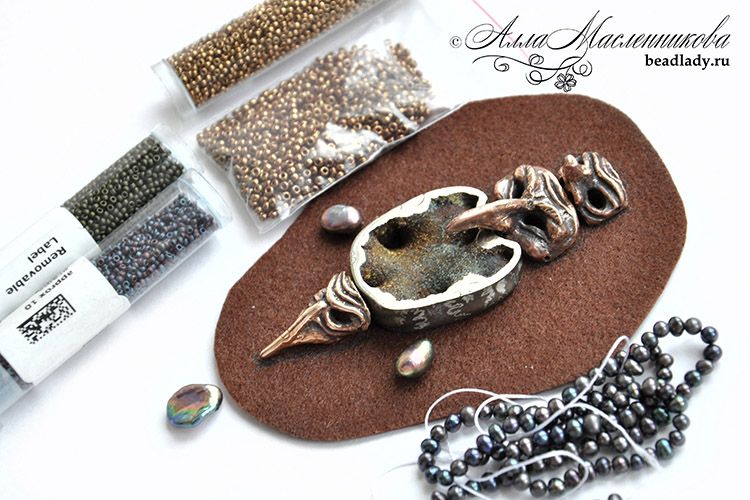
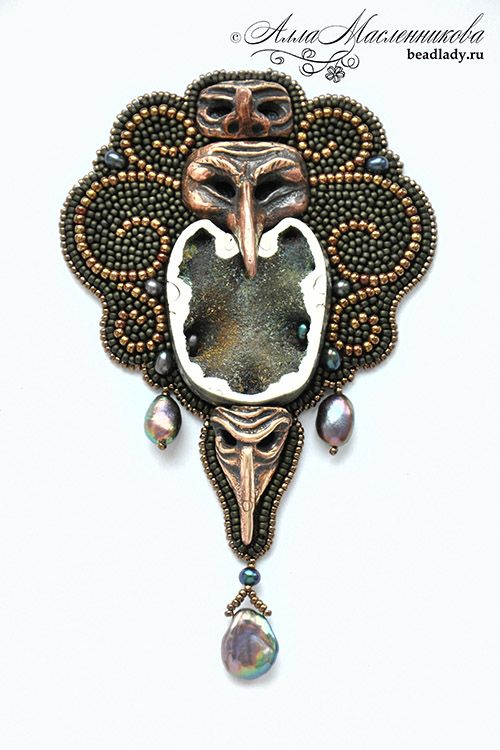
• Ammonite cut
• Three masks from the collection by Anna Bronze
• Seed-pearls of black colour
• Baroque black pearls rice (2 pieces) and one petal
• Beads Toho 11/0 of marble- gilded brown colour
• Beads Miyuki 15/0 of dark bronze and mate dark green metallic colours
• One or two kinds of chains with large link
• Clasp
• Two pins with eyelet
• Basis for embroidery
• Rigid laying
• Leather
• Glue "Moment gel"
• Glue "Moment" rubber or "Crystal "
Now we are ready to start working.
1. It is better to begin with a sketch, especially if you can make it in natural size, as a pattern. It is convenient to base your sketch on the composition of main elements (they are ammonite ,masks and large pearls for us). To begin with we should lead them round on paper on a contour. Then you сan choose the peripheral materials.
Global website update
We make a global website renew. Read about new functions and some future plans here.
Sign up for special
offers
offers