+7 963 858 05 08
Materials:
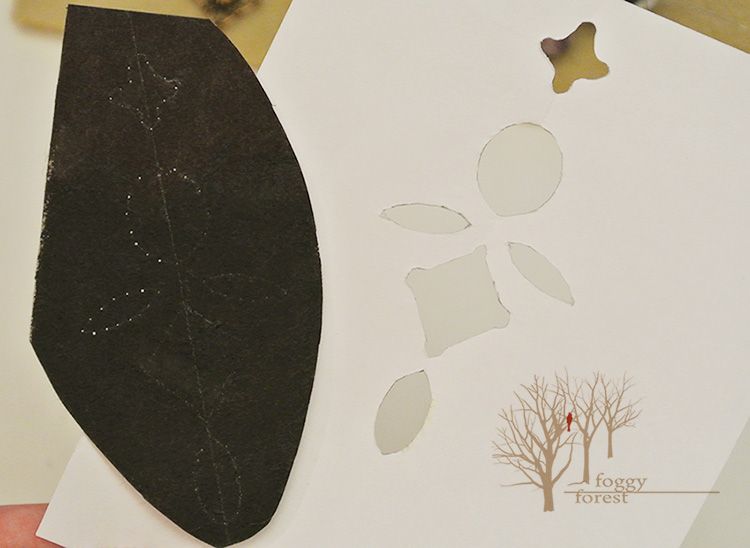
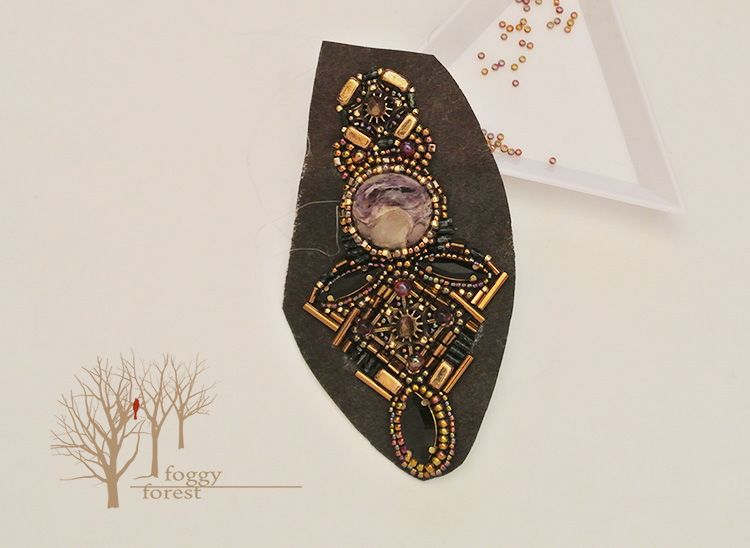
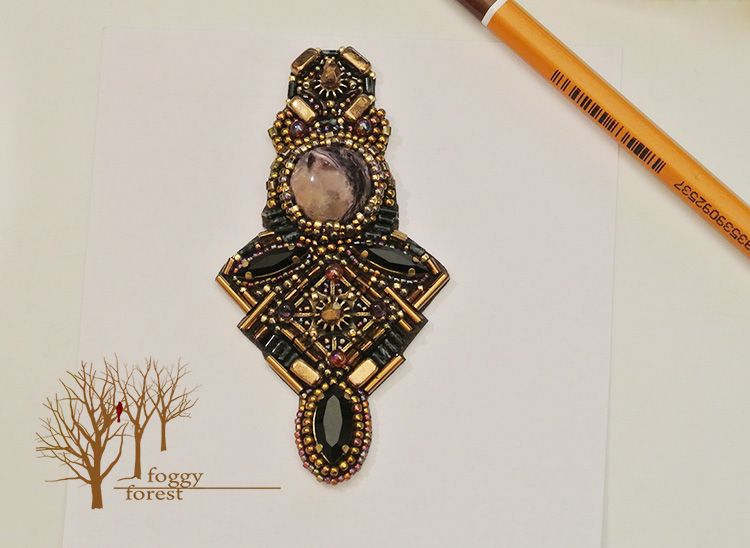
Begin with disposition of main elements. To make it symmetrical and flat we should prepare a pattern and draw a basis.
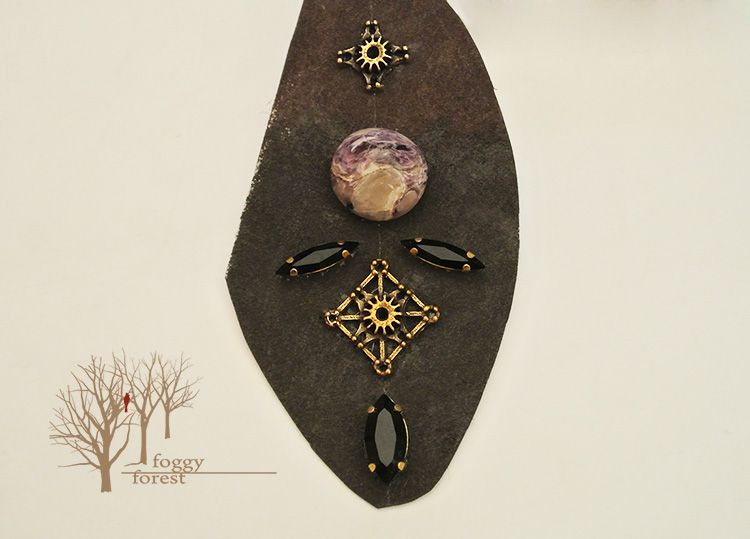
Paste a stone, pastes and accessories as it's shown at the pattern.
Bind and enlace a stone.
Sew pastes and bind them (large with large beads (#513)narrow -with small ones (#459).
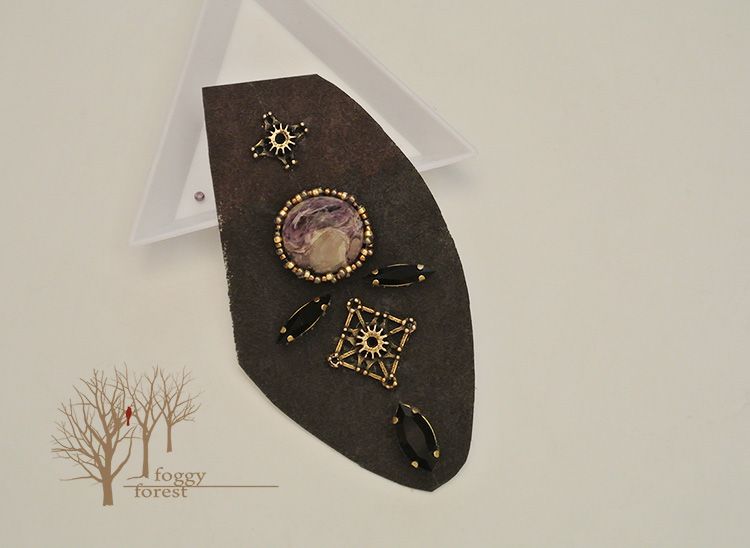
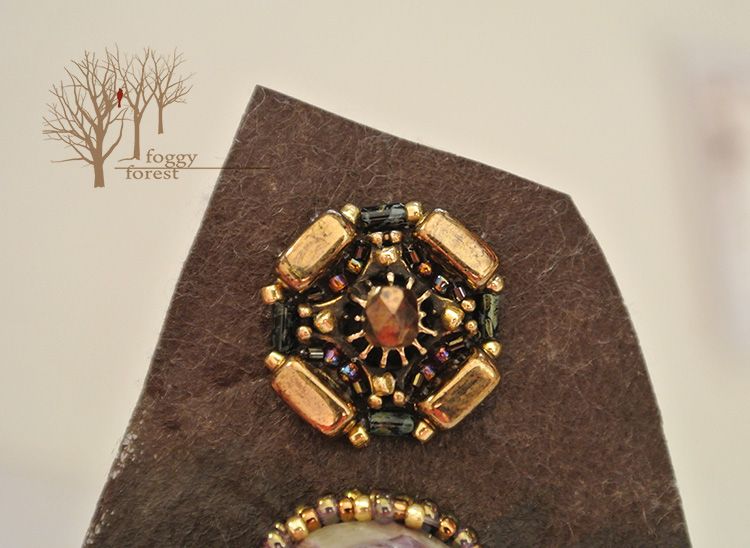
Every element we should sew at the center, using Czech beads.
Fix with glue triangular beads around every large accessory ,sew it after that , joining at the corner with large beads (#201).
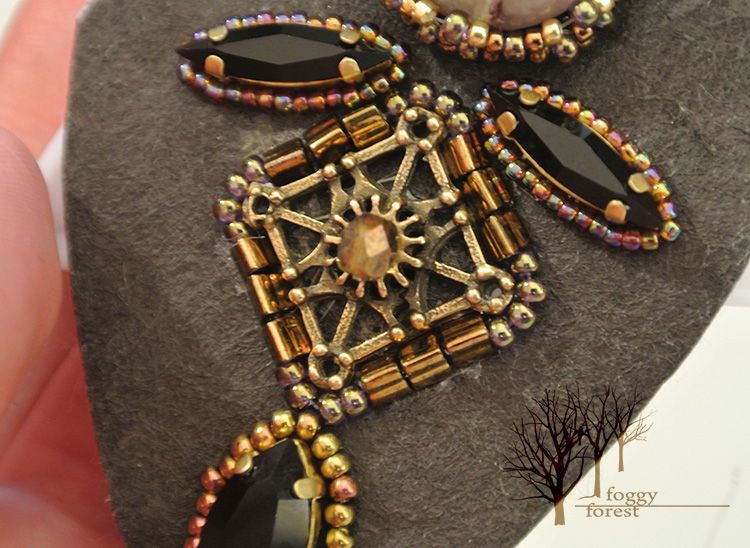
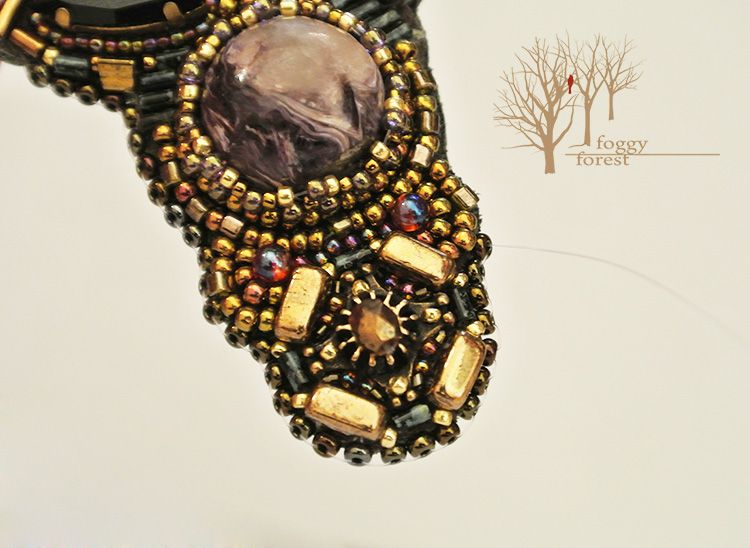
Fill the accessories with beads (#459), sew drops Miyuki of two colours at the edges. Put two metal bricks around the upper element of accessories. Sew bricks, bugles (#221) and triangular beads near the central element ,following from a large paste. I recommend you to paste these elements previously to make it flat and symmetrical.
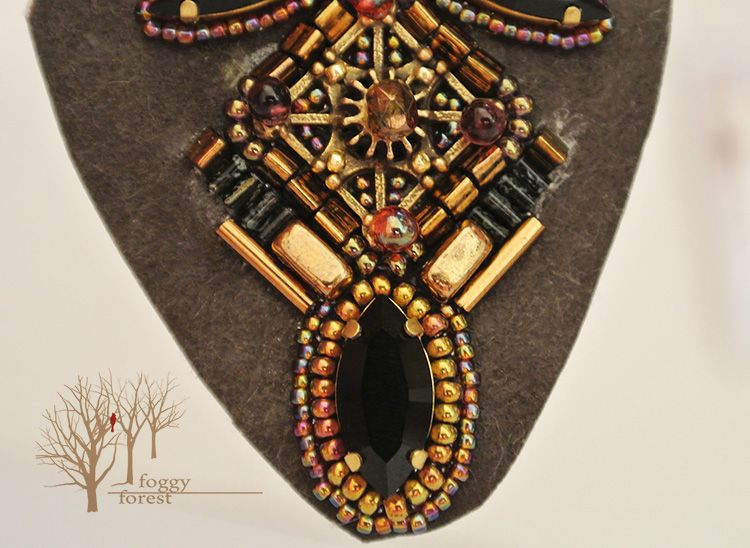
Bind the paste with one more row of tiny beads (#459). Sew long beads after that.
The distance between bricks around the upper element fill with bugles (#Y302)and tiny beads (#PF557). Space between bricks and accessories fill with tiny beads (#459).
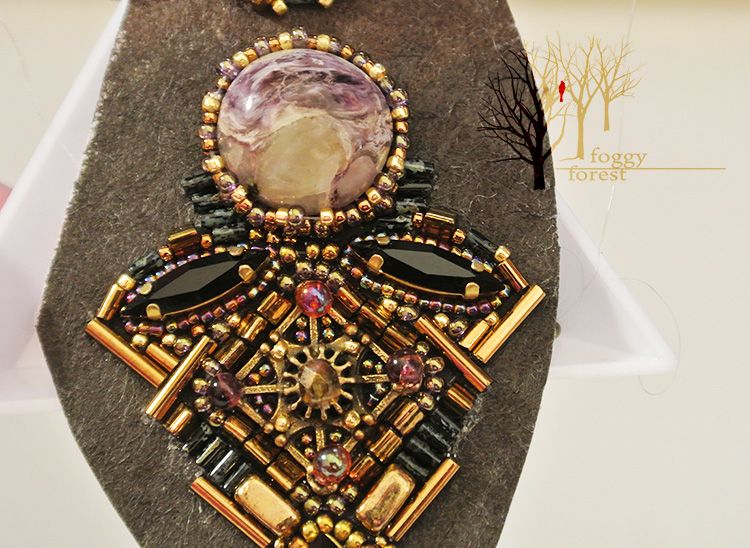
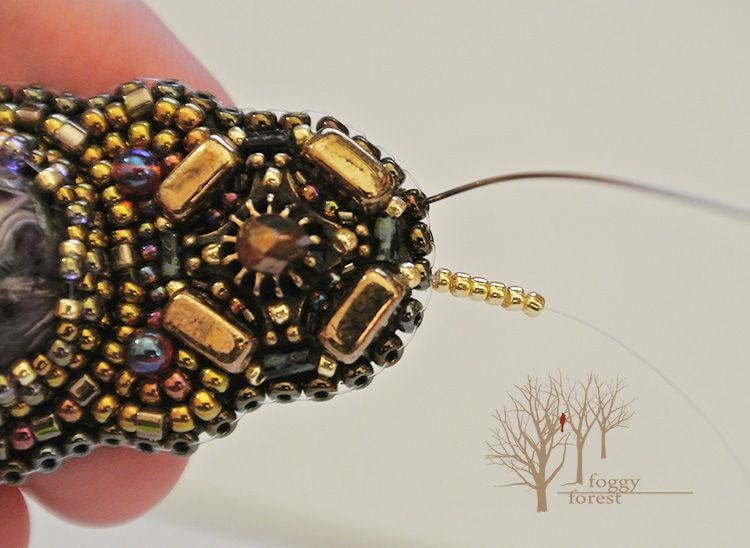
Make tracery around the central element from long and short bugles (#221), fix wigh glue before it, and pay attention to symmetry.
Fill the distance between them with beads. Make tracery from bugles (#Y302) along the central stone,pay attention to symmetry. Join the tracery along the narrow pastes with bugles near the central element, move from cabochon,using tiny bronze beads (#221), triangular gold beads (PF557) and short bugles #221 and #Y302 for it.
Sew one more row of beads around the stone.(#513 and cube #457). Gather upper element of accessory with the stone, adding drops Miyuki and 2 layers of beads (#513) (at the second layer you can add some cube beads to join visually the tracery with a row around the central cabochon).
Cut the accessory at contour.
Paste bonded area paper at the reverse to make it rough, paste leather
and bind the edge flatwise.
Make a loop at the top from tiny beads (#PF557 ).
Fix findings. Earrings are ready!
Basis for embroidery Lacy Stiff Stuff (painted in a dark colour)
Reinforced thread or scaffold 0,16 or 0,18 mm
Two round cabochons 1,6 cm in diameter
Two spacers L1464 from the collection "Steampunk"
Two spacers L1467 from the collection "Steampunk"
Two earwire
Leather
Glue
Czech beads Fire Polished 4 mm
Bricks 3x6mm, (#B23980)
Beads Toho:
3mm #1 - hybrid (#Y302)
9mm #3 - (#221)
3mm #1 - (#221)
Triangle 11/0 - (#221)
Cube 1,5mm (#457)
Round11/0 (#201)
Round11/0 (#513)
Round 15/0 (#PF557)
Round 15/0 (#459)
Round 15/0 (#457)
Beads MIYUKI:
MIYUKI Drops (#257)
MIYUKI Drops (#1884)
Global website update
We make a global website renew. Read about new functions and some future plans here.
Sign up for special
offers
offers