+7 964 190 78 16
Today I'll show you a few techniques used to create a metal jewelry. Most of these techniques are standard and some of the readers will not see something new in them. Although In my experience just a few people solder metal jewelry with pin I often hear the question "What is the pin?", "How to fix this thing here?" etc. So, hopefully, you can find the information from this lesson very helpful.
With conventional pliers open the ring and hang Keys on a flashlight. It has a special loops for this. Then close ring leaving a gap as small as possible. So you can see result on the picture below. -
Before start to solder.
Now you need to prepare a solder. I have a very thin one.
With tweezers take chips solder to the seam and continue to heat. At the point of contact silver solder with metal ring solder quickly melts and flows.
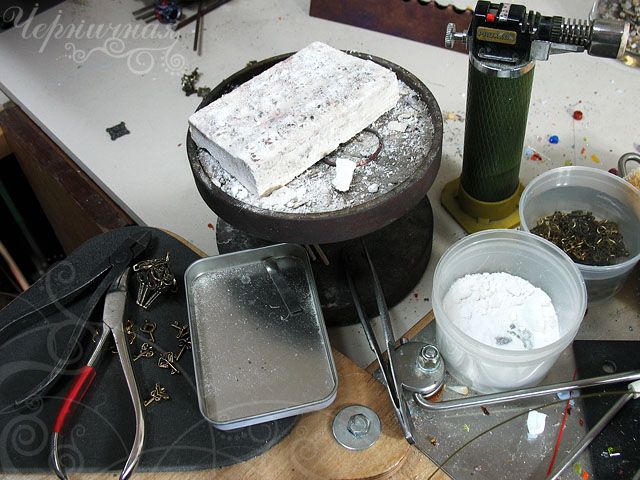
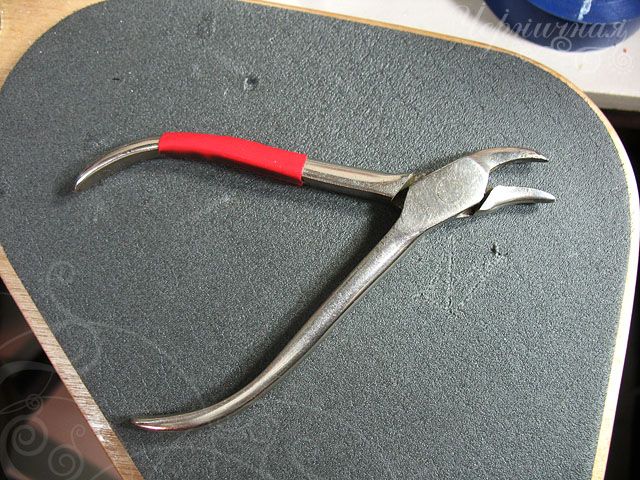
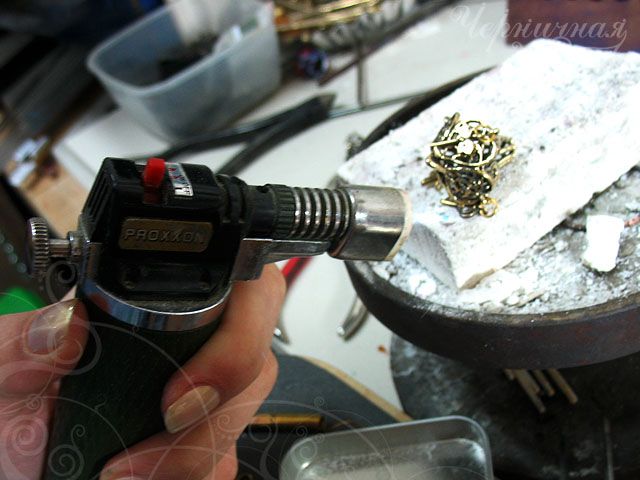
We start with the soldering. What we need you can see on the picture below. Most of the tools are inexpensive and you can find them in any craft's shop. We need a gas burner - it's the most expensive thing (???). I use a Proxxon, but you can buy any one from a different company. Also you will need soldering stone, Borax, also known as sodium borate (?? Сколько), silver solder. You do need to much, 1 gram is enough for a long time. And also you will need nippers, pliers, scissors, bolt (metal rod on which the rings will be wound), citric acid, polishing paste.
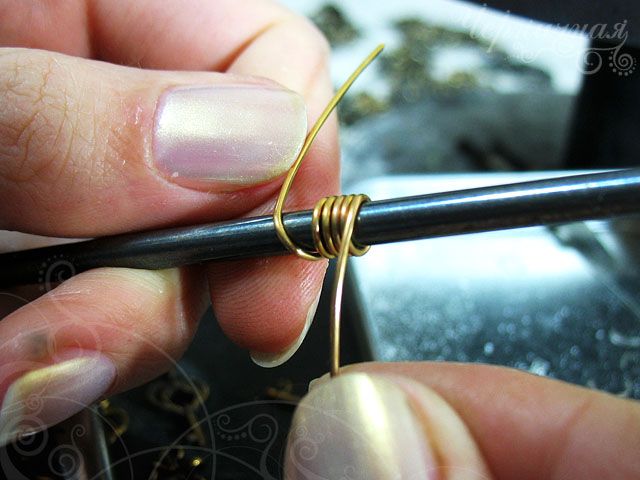
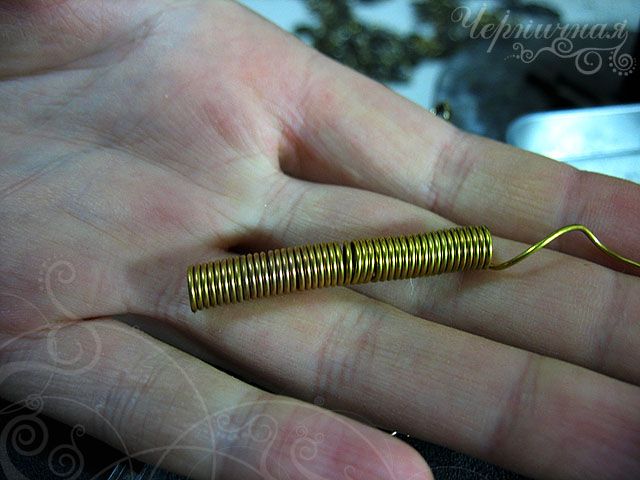
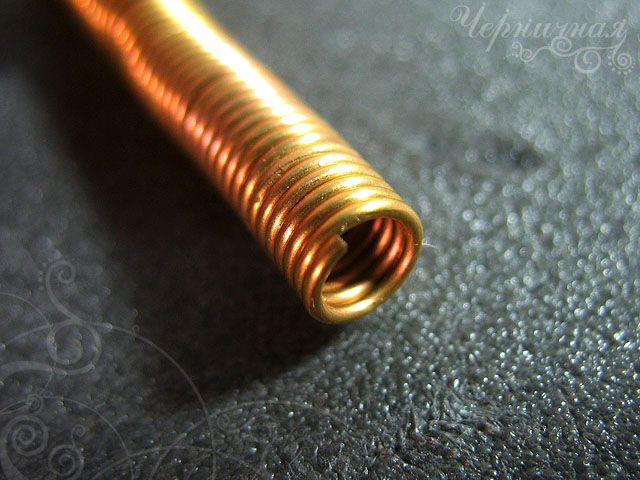
Take the wire and wound plump bolt on your desired diameter. The preferred brass wire, sold in the Metal, bought different diameters without problems. Accordingly, the color will be yellow. If you need the color of copper, then a little more complicated. If the brass wire sold uncoated copper is sold in the form of enamel wire (albeit correct me if I'm wrong, but I did not see the copper wire without enamel), respectively, before working with it the need to burn the enamel.A piece of wire is wound into a tight coil of tweezers and put on the burner gas stove. It smells, but not much. After the smoke stopped to go - under cold water and pull the wire through the cloth - to erase the scale. In general, Navigli wire.Remove from the crossbar, was such a thing -
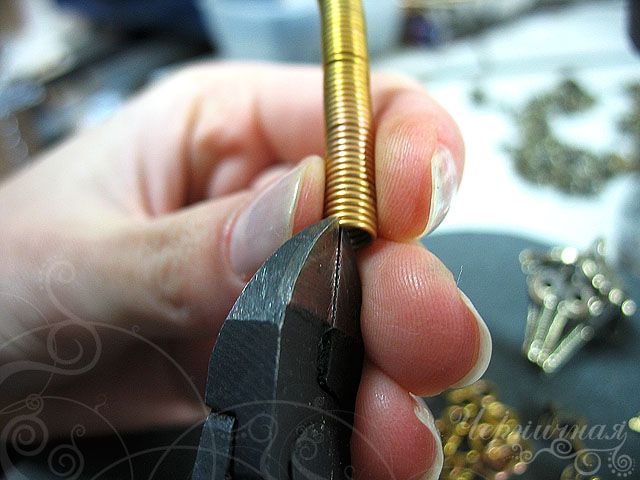
Now you should crack spiral into rings with pliers, as shown on the picture.
Now look at the first ring cracked off. The end of the wire is not blunt, but sharp. If we leave it like this, the ring will not so that the ring will not be tightly converge. We must crack the end.
That's what we have -
Cracked off more rings, for the future:)
Take conventional pliers.
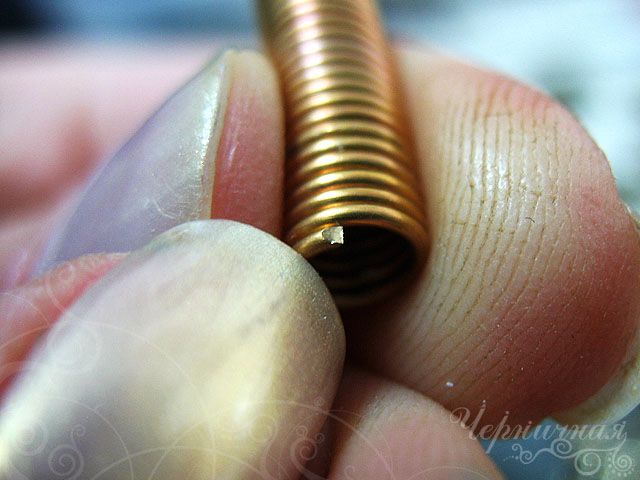
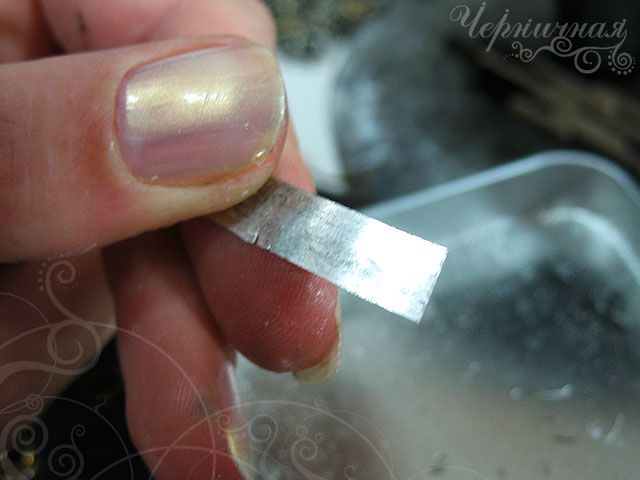
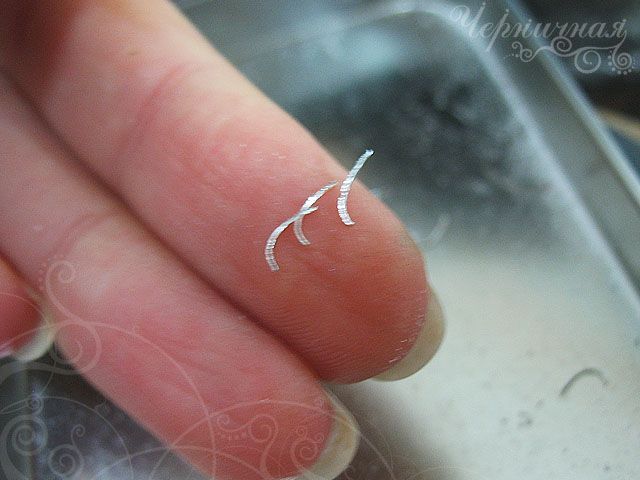
Cut it with scissors as fine as possible, so you will have tiny chips here -
Start to solder
Turn on light and hot a ring until it red, then sprinkle a little bit of borax. Borax helps not to form oxides, which will not allow solder to flow.
Continue heat the ring, until Borax becomes a glassy mass and flowes around the seam.
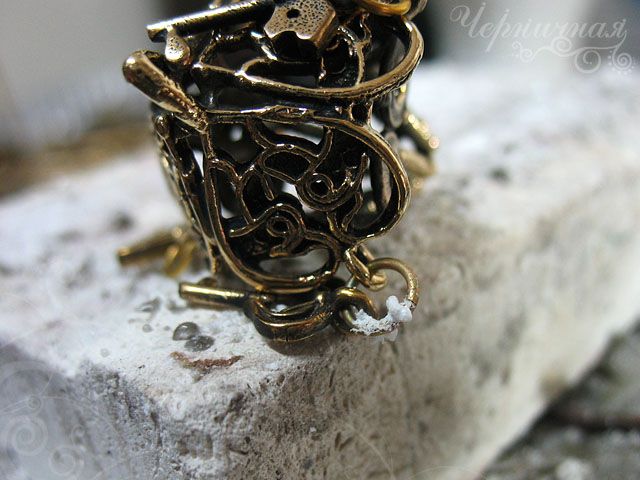
Now you can remove the remaining solder.
The whole operation may require some skill, but in fact, nothing complicated, just need to work out. So now it looks a seam.
If the ring is well reduced, without a gap, the seam is very robust and can withstand the various operations on , you can bend, twist and so on.Do all the other rings. Now we need to remove oxides and borax from the surface of the product. Take enameled saucepan, put....., then the product and boil. When boiled, turn on gas stove to a minimum and let's it stand up. When all the excess dissolved, the product looks like -
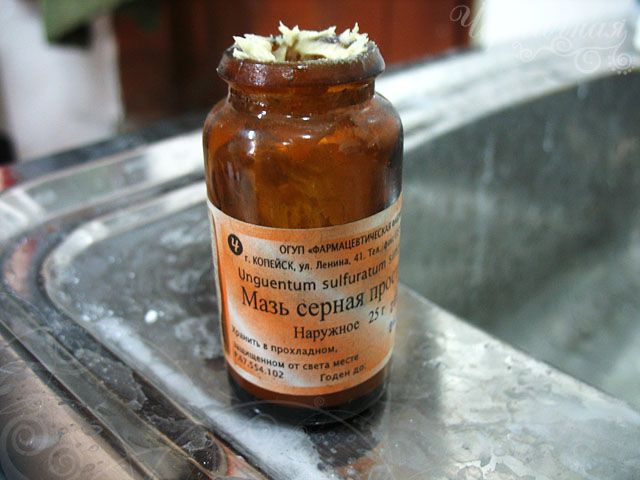
Next you need to black your jewelry. Take sulfuric ointment - purchased at any pharmacy.
Put a small amount on the toothbrush and carefully rub it into the product.
The next procedure will not smell well. I recommend to continue using a fan. You should heat the product with a ointment to warm it up. I use for this a building dryer. Try gently to hold with tweezers over a gas hob, if the dryer is not at hand. Heat until smoke. I repeat - extremely smelly procedure! Should look like this
So, we are moving on. Next, we need to polish the product. You can use a polishing machines. If you do not have one you can use a polishing cloth.
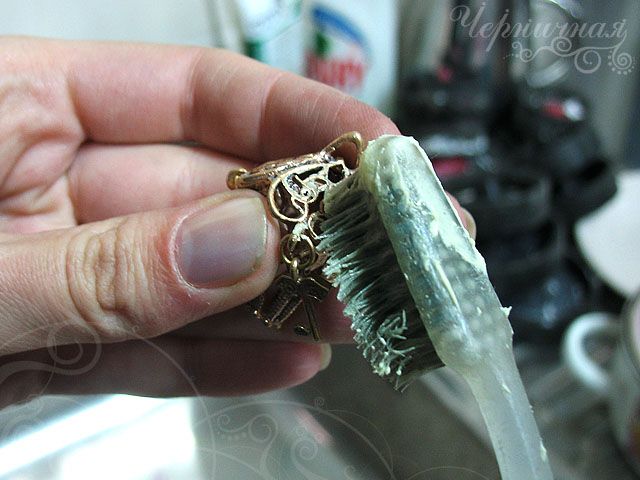
Now we need to wash from the polishing paste. You will need a paste for polishing. Take a toothbrush, not this one you used for sulfuric ointment, just take another. On brush - fairy paste is applied and rub it well. What you will have
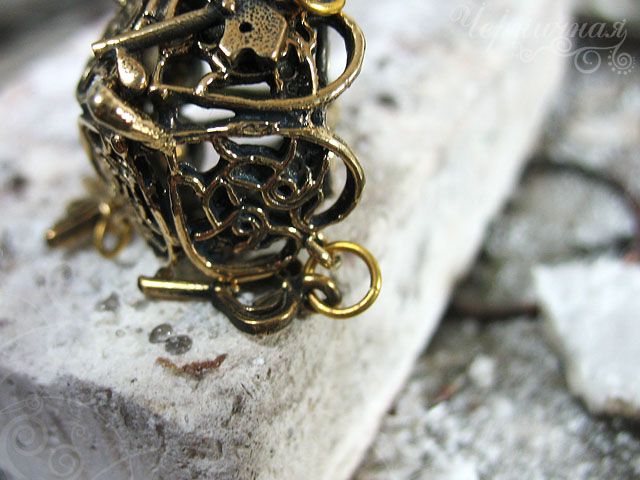
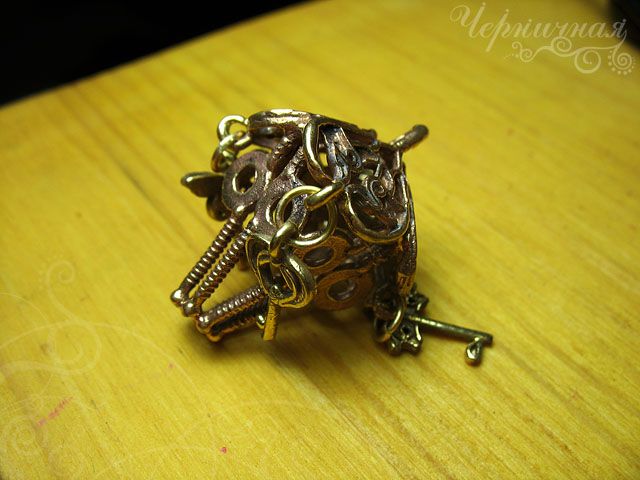
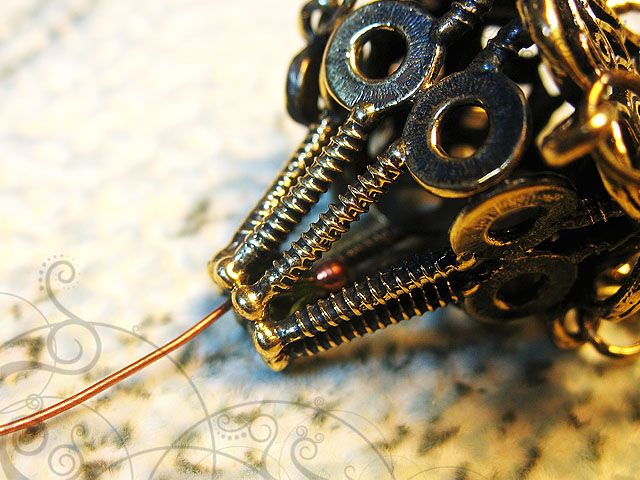
go ahead. Now consider the use of pins. That is what we need -
Take the pin (copper or brass wire with a ball on the end), Swarovski crystal strung and put through the hole in the lantern. So that's about -
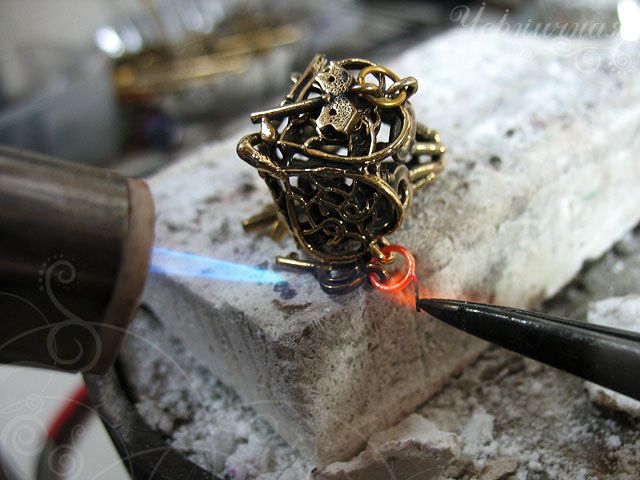
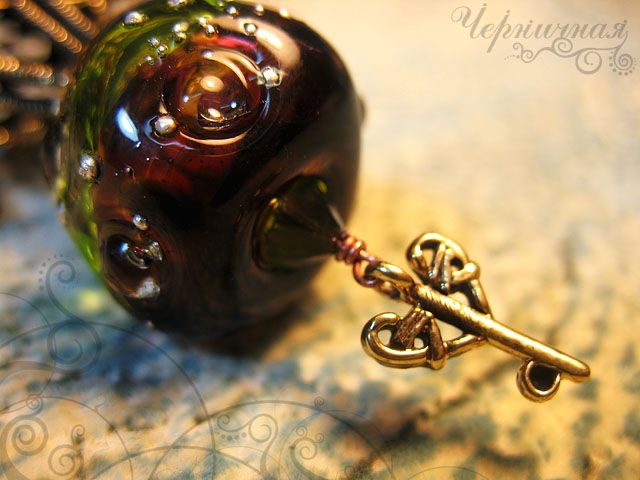
Next put lampwork beads, another key and one more Swarovski Crystal. Please note - the key hanging on a hang tab, which closes the pin
Tighter noose as much as possible, cut off the ends of pins.
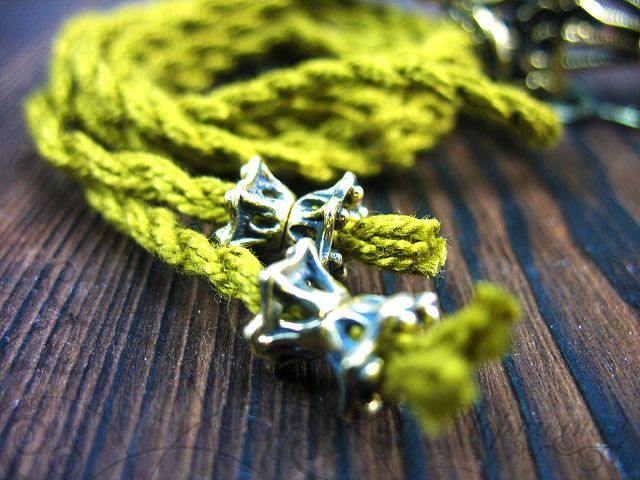
Now hang on the jewelry on the cord and decor the ends of the cord.
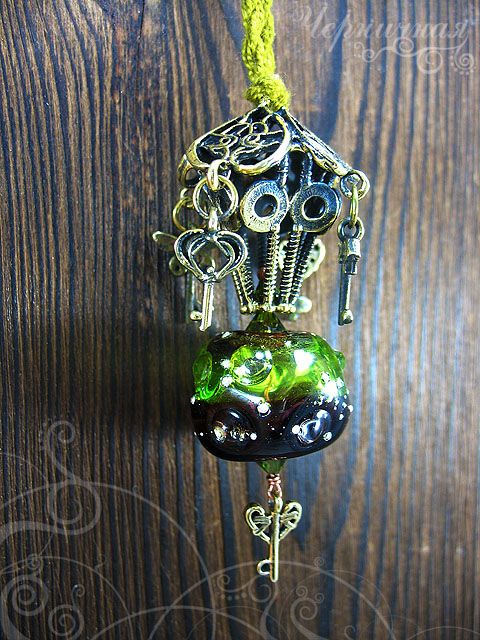
Well, everything - ready. Buy!
Global website update
We make a global website renew. Read about new functions and some future plans here.
Sign up for special
offers
offers